
|
 It's amazing how many people who I talk to who just love the taste of a Weber roast, but if asked if they'd ever be interested in having a go at cooking one, they look at you like you've just asked them to have a crack at bomb disposal. Too many people think that the 'complication' isn't worth the effort. I think a big part of the problem is that when you go hunting for tips and techniques for Weber cooking you will discover a vast array of recipes, basting techniques, charcoal arrangements, complex cooking time calculations and temperature control techniques. This results in the learners among us feeling inadequate and left out, and this in turn leads to Webers being relegated to the corner of the patio as nothing more than a showpiece beside the barbeque. This brings us to why I've created this article. It's a no-nonsense guide on cooking a roast on a Weber from start to end. I have seen and tried varying techniques but the technique in this article is what works consistently for me every time. If I introduce too many variables it's likely it will make the article confusing - especially to the Weber learner, so we'll stick with just the one simple technique. Don't get me wrong though, this is no next-best technique, it will cook as good a roast as you will taste anywhere, if not better! I've since updated this article with a new technique; don't be surprised if it changes again as I refine my cooking, so check back occasionally! Before You Start - Checklist There are a few things you absolutely need to start cooking on your Weber, and there are a few things that make life far easier and you could do without, but I wouldn't recommend that - make it as easy on yourself as possible, take the stress out of the cooking! If you are reading this 5 minutes before you start cooking in preparation for a bunch of people coming over and you don't have a few of the optional items, you will have to decide for yourself whether to proceed using the Weber or go back to using the oven. Here is the checklist:
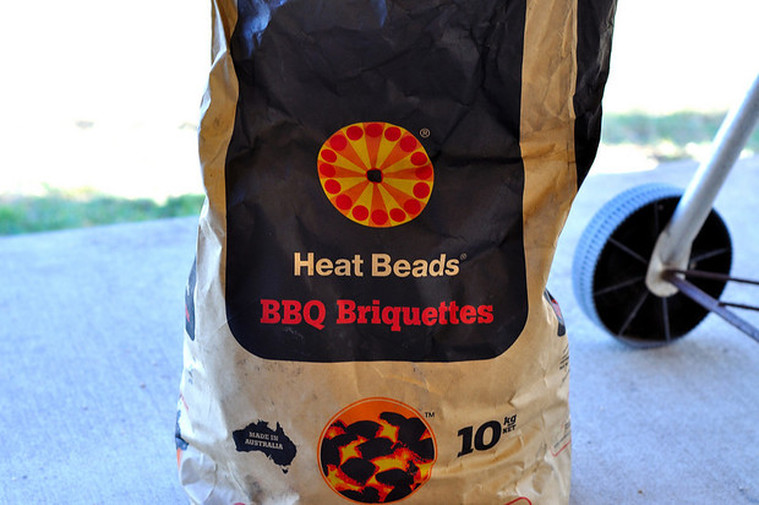 I've heard from an other fellow Weber cooker that these beads aren't so great. Maybe it's because they do take some time to light, but I think this is actually a strength of these beads. If they're done right, they are slow burning and don't go out.
Preparation Start early. From experience to cook a roast that weighs a couple of kilos the whole process from lighting the starter to removing the roast from the Weber takes around 4 1/2 hours. Something like a small turkey or chicken takes around an hour less than that. I need to start timing the process, but I've found there to be some variance unless you keep constant watch over internal temperatures. What you can do if you don't have a lid temperature gauge is place an oven thermometer inside the Weber beside the roast in such a place where you can shine a torch through the vent holes to check the temperature without opening the lid. You can then work to make cooking times more predictable. Oh, and your roast MUST be completely defrosted. The first thing you want to do is prepare your catching tray. This is vital for two reasons. It will help keep mess at bay and by filling the tray halfway with water it will help to keep the roast moist. The weight of the water also helps to keep the tray in place. I make my trays nowadays. Even though they are fairly cheap to buy I never seem to have one on hand when I'm firing up the Weber, so making them guarantees I'll have one. Don't be tempted to use one of your favourite baking trays - if you forget about it when you shut down the Weber it'll rust or clag up with the consistency of cement and baked grease. Besides, half the fun of a Weber is way less cleaning. Here's how I whip up my trays: Tip: Heavy-duty foil makes for a more stable tray, especially when it comes to removal after cooking is complete. Starting the Lighting Process This step assumes the Weber has been used before. Take out the top grill and remove any old briquettes and place them into the chimney starter. A lot of people are surprised to learn that briquettes are indeed reusable. Don't bother trying to use the smaller pieces that are small enough to fall through the base grill. Put the chimney starter aside, take the base grill out and take the Weber to a corner of your yard and tip it upside down. Use a stick or something similar (though not metal) to scrape off any buildup around the lower vent area. Setup the Weber somewhere where there is nothing overhead for a couple of metres and replace the base grill. We're going to have the chimney starter going and there will be a bit of immediate smoke and a lot of heat to follow. It won't be close enough to burn your patio roof, but if you were to light it in the same place all the time you could end up staining the ceiling. Not to mention filling your patio area with smoke during the first few minutes of startup. I place mine on the grass, in the open beside the patio. Make sure no kids are going to be playing anywhere near it. Lighting the Chimney Starter Fill the chimney starter up with fresh briquettes (along with the old ones you collected earlier if applicable). I used to use newspaper to start the chimney starter, and you will find other people recommending this same technique on a number of Weber sites. However, in some recent cook-ups this technique failed me, and when it fails it throws your time out a lot. I've started using a new technique using an old food tin that fits comfortably under the chimney starter filled with methylated spirits. I used an old baked beans tin, and I fill it halfway. The metho burns for a long time, and because it's partially shielded under the chimney starter, it does not go out. Make sure the Weber does not get knocked by kids or dogs while the metho is burning. Also, don't get attached to your tin; throw it out as soon as it starts looking old - you don't want a stream of fire leaking down through the bottom vent holes of your Weber. Place the metho tin on the base grill and light it up with a BBQ lighter (a longish one so your hand doesn't get burnt), then gently place the filled chimney starter over the top of it. Now, wait. Using this method my starter takes a bit over an hour to be ready, this is why we need to start early. I'm still looking for a faster way of getting the briquettes burning. You know the briquettes are ready when the topmost briquettes have turned a uniform grey. At this stage, if you started the Weber safely out of the way, you can carefully move your Weber back into your patio area, the heat is going to be contained from this point on. You could even stick it on a timber floor if you like (as long as you have the lower catch tray fitted), but do not place it into an enclosed area, the area must be open and well ventilated. Once all the briquettes are uniformly coated with ash, you can transfer the baskets onto the lower grill of the Weber for cooking (see pics below for positioning). The pictures above show the briquettes are not quite ready. Don't be tempted to fast-track here, or you will risk the Weber going out part-way through the cooking and you'll have to wait another hour for the briquettes to re-light. Let them ash over properly and you won't have any problem. When I place the baskets, I tilt them onto the walls of the Weber (as in the pics below) to help create some distance between the briquettes and the roast. Remember, we are cooking indirectly; we want to avoid direct heat. Start Cooking Well, not quite. There are just a couple of simple steps we need to complete before we introduce the roast. The next step is to place the catching tray in the middle of the lower grill (between the two briquette baskets) and fill it part-way with water. If you forget to do this before you place the top grill you'll have a hard time removing the top grill again without burning yourself. Now you can place the top grill and give it a scrub with a wire BBQ brush. I don't use things like stainless scourers - your grill won't season as well. Once it's scrubbed, use your paper towel with a bit of cooking oil to give the grill a quick rub (don't try rubbing it above the briquettes or you may end up with a fire). Now place the lid on for a couple of minutes to help kill any bugs before we place food onto it. Make sure you have ALL vents fully open - the one on the lid and the vents underneath. Although these can be used for temperature control I have never really found the need to use them. You might begin to learn their use if you want to be more precise with your cooking times.
Now place the roast above the catching tray (note the layout of the baskets and the catch tray) - another important thing to note is because of the use of different archive photos the roast and layout will be different in some photos: 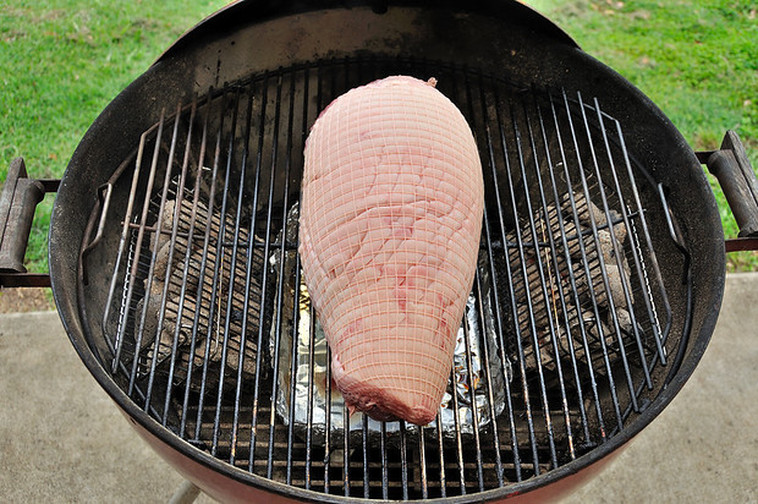 Put the lid on ensuring that the top ventilation holes over one end of the roast, NOT over one of the briquette baskets:  Now take note of the time. The clock has started! Your next milestone is in one hour. You may have noticed at this stage that we haven't done anything to the roast. We haven't basted it, oiled it, anything. Although this is more personal taste, I don't baste my Weber roasts at all no matter what I'm cooking. Along with the water in the catching tray, a Weber cooks an incredibly moist and juicy roast. In fact I have found basting makes a roast too oily. This is in contrast to oven cooking which I think dries things out more. Likewise with wrapping in foil - I don't do that for Weber cooking. I used to wrap my roasts at the start, but eventually worked out there was no point. It only serves to waste more time with more messing around. I found the moisture level was perfect without foil, so why use it? You may consider wrapping the extremities of turkeys and chickens. If you're cooking pork with crackling you might want to lightly oil the crackling and salt it - the oil is really only there to help trap some salt. Cook your first roast without basting before deciding whether to try it next time. I used to also try various wood chip additives to the burn as well (even gum leaves) to create flavored smoke but I found I enjoy the taste of meat cooked in its own natural juices more. Half the fun of the Weber is experimenting with different cooking methods, you're bound to come up with a winning formula. Here is another tip. If you don't have a top grill with flip-up sides, go get yourself one. It makes replenishing briquettes far easier. The First HourYou need to check the roast after one hour. What you're looking for is burn-down on the briquettes. The general rule of thumb is to keep the baskets full. That's easier than counting briquettes. Give the already burning briquettes a light nudge to settle them, but don't try packing them together - you'll only starve them of oxygen. You want the new briquettes to sit nice and firm on top of the burning ones. Because we're using two-sided indirect cooking there is no need to flip or turn your roast. It is cooking evenly. That's it! About 2 minutes of work replenishing the briquettes is all it takes at the first hour milestone. You can sit down and relax again now. Smooth Sailing Your roast can now virtually look after itself. Keep tabs on the time and keep checking it every hour and replenishing briquettes at those points. Don't check the roast any more regularly or you risk losing too much heat. If you see the briquettes from the previous hour don't look like they're burning very well (i.e., they're still mostly black), leave the lid off for about 10 minutes; this will allow good oxygen flow over the briquettes and encourage the new ones to take. The time you spend re-firing the beads is the difference between a long, slow cook and a controlled roast. A long slow cook is great if you start earlier and get your timings right, but most people won't want to be babying a Weber all day long, half a day is enough. After a couple of hours, start checking the roast with your meat thermometer and start reducing the checking intervals as it gets closer to being done. This is guesswork, so if you're nervous about it just check more often. Eventually you will gain more of a gut feel for time. Make sure you drive the spike into the thickest part of the meat and drive it halfway down so you don't end up with a partially raw roast due to a bad reading. Roast Vegetables Towards the end of the cook you need to get the roast vegetables on the go. Try to guess an hour before the roast is ready when you put these on - use my timings above to try to figure that out. In general, it's better if the meat is cooked before the vegetables rather than the other way around, because you can re-heat the meat if necessary, but your vegetables can dry out or become soggy if you try to re-heat them. You want them fresh off the cooker. For my roast vegetables I use my second Weber with the gas kit set to full power. You can use whatever you're comfortable with - oven cooked roast vegetables are nice too. I converted the Weber to use it as an alternative to a BBQ and to also use it for shorter roast times for my roast vegetables - it doesn't require the hour and a bit startup time that briquette powered Webers need and it provides all the benefits that Weber cooking gives. It's also far more convenient than cooking in an oven believe it or not - you don't need baking dishes or anything, just throw 'em on (less cleaning up):  Once I place the vegetables on the grill I give them a quick spray with Spray & Cook, lightly salt the potatoes and that's it. Put the lid on and check their status with a torch through the ventilation holes occasionally. The telltale that everything is cooked is when the potatoes start turning a golden brown (give it around an hour). The stainless cup on the side holds water to keep everything moist as it releases steam. The oven thermometer is there for show, I didn't bother looking at that. The first thing that may come to mind is that everything will dry out horribly. Well, this is where the Weber works its magic once again. The potatoes come out crispy on the outside and deliciously moist in the centre, whilst the sweet potato and pumpkin are to die for. After cooking, the skin easily peels away from the sweet potato without trashing it, whereas the pumpkin wants to fall apart, so treat it carefully. You might like to also add carrots and onion. Lighter vegetables can be wrapped in foil with a bit of water added. Roast is Cooked This is the bit that we've been waiting for - the roast is cooked. Use your meat thermometer to confirm it's all done: 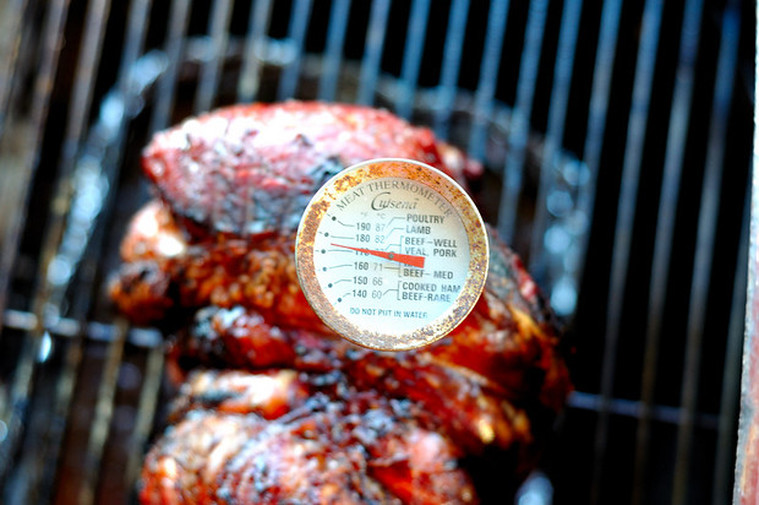 I've overcooked this one slightly. Ideally you want to remove the roast a bit below the mark you are aiming for (well done or medium done - I prefer well done), it will continue to cook for around ten minutes after removing from the Weber when you wrap it. Remember from earlier when I mentioned that my archive photos will be showing different roasts, not the same one all the way through. 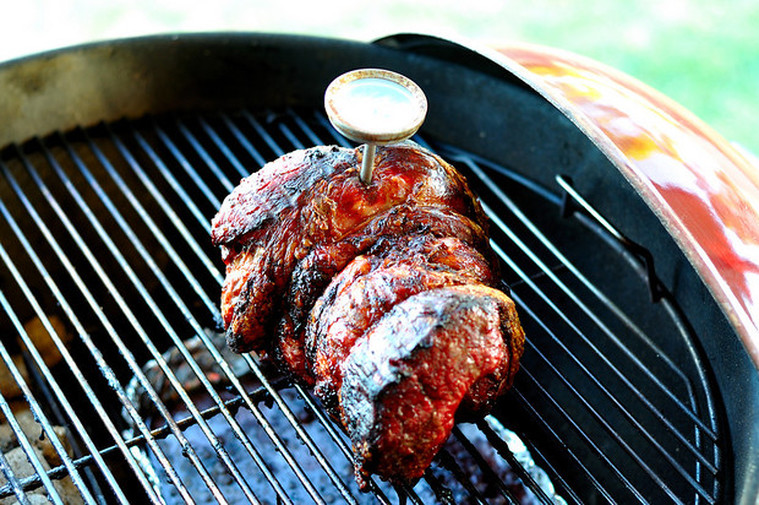 Here is a better roast; the one above was using my old indirect technique with all the briquettes over one side. This is the newer technique with the briquettes on both sides - this roast has cooked far more evenly: 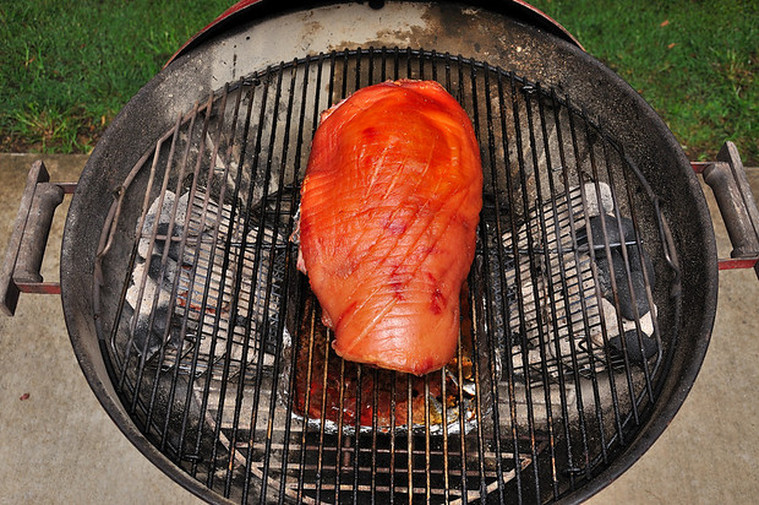 When you remove the roast, you MUST wrap it in foil straight away and forget about it for at least 10-15 minutes. This will let the cooking cycle complete and trap all the juices to improve taste. If you remove the roast slightly under-cooked, then wrap the roast completely. If you remove the roast when it shows as being done, then only make a foil hood over the roast - do not completely wrap it. When the timing is right, the vegetables are done when the roast is ready. Here's how the vegetables turned out:  Shut the Weber Down The gas Weber gets shut down by turning the gas off (duh!). The Weber holding the briquettes gets shut down simply by closing the upper and lower vents. That's it, close and forget! Don't attempt to hose the briquettes down or anything silly like that unless your Weber does not seal properly. The first couple of times you shut it down, monitor the temperature by giving the lid a quick touch occasionally to ensure it doesn't try to stay alight or you may actually need to forcefully put briquettes out. I converted my badly sealing Weber using a genuine gas kit (50 bucks on special) so that solved that problem. My other Weber that I use the briquettes in seals beautifully. Don't let the lid drop and it will seal pretty-much forever. By closing the vents you're starving the Weber of oxygen and the briquettes will go out. When they go out they're reusable! The Carving of the Roast At long last we get to carve the roast. This is a roast from before I perfected my technique and it's still spot-on and was on time: 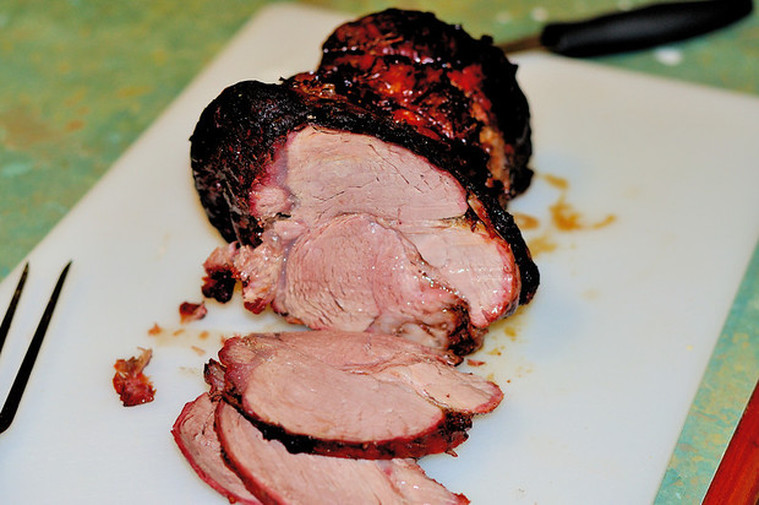 Summary
So there you go. Not so scary is it? With a bit of thought, planning and monitoring it will all go well. The two big things that can go wrong are the briquettes going out, or losing track of time and ending up with a shrivelled, way overcooked roast. Neither of these things will happen with only a little bit of work. You don't have to run around in a mad panic if you follow the simple steps laid out in this article. Stay calm, stay on the job, and relax and have a beer or two while you tend to your Weber every hour or so. And remember you don't need to take a measuring tape to my setup, use any method you like to set it up, my method is just to show an example of how to get started. You no longer have any excuse, go for it! If you keep an eye out on the 'For Sale' section in your local paper or check out garage sales you can pick up a Weber for next-to-nothing from someone else who was too scared to fire the thing up. These things last for years and years. Your Sunday roasts will never be the same and your friends will be impressed no-end with the most amazing taste ever produced for a roast dinner. You will also have next to no cleaning up compared to cooking with baking dishes and pots. Enjoy! I hope this helps break the ice for some of our sufferers of Weber Phobia! |
AuthorTroy Simpson shares research on various topics. ArchivesCategories |
 RSS Feed